
Because of continuing medical issues with a family member, I didn't make it to the card project today, but I did get there last Sat. and I have finally taken some time to post the card.
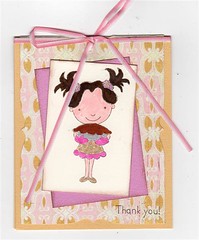
The greeting card at Cherish The Thought is rubber stamped and coloured with Tombow markers and the image is layered over a pink cardstock. The card base is yellow with a die cut "apron".
Showing posts with label greeting card. Show all posts
Showing posts with label greeting card. Show all posts
Saturday, 16 October 2010

Sunday, 26 September 2010
Greeting Card Sept 25
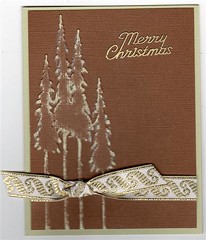
I took a bit of a creative break yesterday, since I found a transit route that allowed me to stop in Port Moody, then carry on to the hospital. This is the Neat Nique for Sat Sept 25 at Cherish The Thought. We used a tree embossing folder on Core Color cardstock and sanded the high spots. There is glitter added to the light areas of the tree, but of course not very easy to see on screen. The core color piece is added to a light green card base and a Merry Christmas Peeloffs sticker is added as well as a lovely ribbon. It was nice to be creative for awhile.
Monday, 6 September 2010
Sept 4 Greeting Card
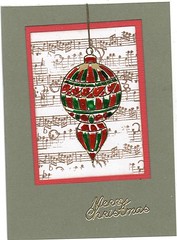
This is the Sat Sept 4th Neat Nique card at Cherish The Thought. The white background is stamped several time with Crafty Secrets music border stamp, layered on a slightly larger red cardstock and mounted on a green base. The peel-offs Merry Christmas is added just below. The acyclic card front is scored at .25 in. and attached to the back of the card with Soukwang tape. The peel-offs ornament is placed on the front of the acrylic and coloured with glaze pens.
Wednesday, 1 September 2010
Greetong Card Aug 28
This is the neat nique project from Aug 28 at Cherish The Thought. Yes I got there and am thrilled that I did. This is a wonderful technique that I am sure I will be doing again. The black and white photo printed on shiny cardstock is hand coloured on one of the roses with pencil crayon and blended with a paper stump. This is layered over 2 pieces of cardstock, then onto a pale grey embossed piece and finally on a lovely light green card blank.

Thursday, 12 August 2010
Greeting Card Aug 12 Byhand Challenge
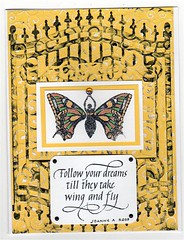
Yellow is one of the themes for the Byhand Challenge this week and I used a yellow scrapbook paper embossed with the butterflies background from the Cuttlebug Heritage embossing folder set. I sanded the high points to reveal the white core and then flattened it back out by running through the Cuttlebug a second time without the folder. Next I embossed with the gate folder, also from the Heritage set, and rubbed a Tuxedo Black Memento Dewdrop ink pad over the high points. The butterfly wings from a Crafty Secrets set are stamped and embossed with black, then coloured with gel pens. This is layered over a yellow and then white cardstock, attached to the gate background and a yellow gem sticker added to the goddess which is a Quietfire Design stamp. "Follow your dreams" quote is also from Quietfire Design and is stamped with Tuxedo Black Memento ink on white cardstock and attached to the gate with brads. This is then attached to a 5 X 6.5 white card blank
Monday, 9 August 2010
August 7 Greeting Card
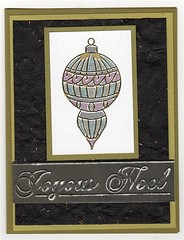
The neat nique for Aug 7 at Cherish The Thought is a head start on Christmas cards with a peel-offs ornament on white cardstock, coloured with gel pens then mounted on green cardstock. This is mounted on black handmade paper, then onto a paler green cardstock and finally onto the green card blank. The sentiment is embossed with a Crafts Too folder on the dark side of double-sided scrapbook paper and sanded. Just don't look too closely at my colouring mistake which has nothing to do with Jessie's teaching, but is all my own.
Monday, 2 August 2010
Greeting Card For July 31
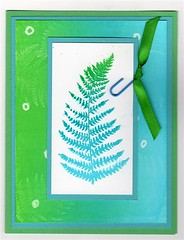
Here is the card I made at Cherish The Thought for the Sat Neat Nique. For this we used a fern stamp and stamped it with Versamark on shiny cardstock, the drew random circles with a clear glaze pen. Next step was to brayer ink from a Big and Juicy Waterfall ink pad onto the cardstock, then rubbed with a tissue to reveal the fern and circles. Now we used a different fern stamp and stamped it on another shiny cardstock. This was layered over coloured cardstock, then over the masked and brayered piece, over another cardstock and finally on a green card black
I think it's very pretty and this is the first time I did masking and brayering ink like this. Big fun and I need a Big and Juicy ink pad.
I think it's very pretty and this is the first time I did masking and brayering ink like this. Big fun and I need a Big and Juicy ink pad.
Saturday, 24 July 2010
July 24 Greeting Card
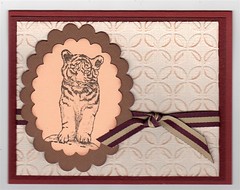
Today's Neat Nique card at Cherish The Thought uses White Wash Core-Dinations cardstock and a new Cuttlebug embossing folder. This is lightly sanded to let the base colour show through. The stamp is from Local King rubber and is stamped with StazOn ink on cardstock cut with the Nestabilities scallop oval die cut. Jessie provided this beautiful striped ribbon which provides the perfect finishing touch.
Sunday, 11 July 2010
July 10 Greeting Card
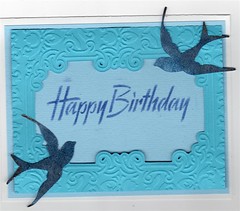
Here is yesterday greating card from Cherish The Thought. We used another of the new Cuttlebug Embossing Plus folders, but I didn't buy this one so I'm not sure of the name. This one is quite large and we used only part of it to fit a standard size care. Happy Birthday on the lighter blue cardstock is stenciled with stamp pad ink and a brass sencil. The birds are a Sissix die cut with adhesive paper and glittered. This is mounted on a white card blank and the embossed layer is mounted with glue dots.
Sunday, 4 July 2010
July 3 Card Project
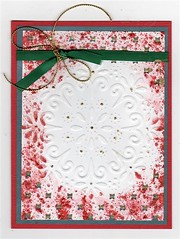
So the previous journal page used one of the new Cuttlebug Embossing Plus folders that just arrived at Jessie's store and I was lucky to be there before she introduced them at the Sat. Neat Nique and therefore had the journal page to show to rave reviews on Sat. This card made yesterday at Cherish The Thought uses the Cuttlebug Blooming Bouquet Embossing Plus folder on shiny card stock. The edge is coloured with Memories re-inkers on an application tool and blending solution. This is layered on green cardstock and then onto a red card base, with green ribbon and gold cord for trim. The little dots on the design are coloured with gold leafing pen.
Tuesday, 22 June 2010
Birthday Card


After doing the card at Cherish The Thought I gave a try at my own version when I got back home. I used Bungalow Blue texture magic for my background and crumpled foil to add texture. The second image is the inside of the card and I used it as a birthday card for my son.
Saturday, 19 June 2010
Greeting Card June 12
On June 12 Andrew was in charge to the card project at Cherish The Thought and had us spread molding paste on glossy cardsock. We then spread crumpled foil over the paste and removed it to make texture. We used craft metal sheet pieces and a metal charm to embossed with the BigShot machine. This was mounted on black paper. We used a Spellbinders die to cut a portion of the texture piece and used the main piece and the smaller label piece on green card base. A strip of the black paper was glued on the larger background and the embossed metal was mounted on the label portion.

Greeting Card June 5 2010
The project on Sat June 5 at Cherish The Thought was using Dreamweaver stencils and molding paste. Jessie demonstrated using the molding paste, but since it takes awhile to dry, we used the stencils for embossing and then used inks to stencil the design. I was lucky to be there near the end of the day and was given 2 of the samples for using on projects. You can see those samples on my Flickr account.

Monday, 24 May 2010
May 22 Greeting Card
This is the card project for Sat. May 22 at Cherish The Thought. The rubber stamped and embossed image on this card is coloured with Tombow markers, then the image is attached to black card with Sookwang tape. The red card front panel is embossed with the Tim Holtz Bingo embossing folder and attached to a black card base. The flower and a blue rhinestone adds a bit of bling. A bit of a challenge for me doing this card as I haven't done much with any markers before.

Sunday, 16 May 2010
Satuday Product Launch Projects


Jessie from Cherish The Thought had lots of new products arrive last week so she had a launch party on Sat. and that meant we were in the classroom for Neat Nique and made not one project, but 4. We got to try out Tsukineko Shimmer Spritz, Tsukineko Walnut Inks, Staz-On Metallic Ink with Refills and used these with Tim Holtz Embossing Folders and Tim Holtz BigZ dies including the borders.
It was a very fun day and of course I got in some retail therapy afterwords. Now I need to collect up my ATC binder and geat ready for an afternoon of swapping with ATC Vancouver at The Grind.
Saturday, 8 May 2010
May 8 Greeting Card
This is the Sat, May 8 project from Cherish The Thought. We had a choice of 4 different designs and I chose this one. The bird is a die cut with double sided tape on it cut to the various shapes for the different colours of glitter. A section of tape is removed and the colour of glitter added, then the next piece is removed and another colour of glitter is added until all of the bird is done. Next the blue background is embossed with a Tim Holtz embossing folder. The branch is cut with a Sizzex die. The tape on the card base is removed and I added black glitter to make the border. All this is added to the blue background which is then added to the base card.

Sunday, 11 April 2010
April 10, 2010 Greeting Card
This is the card I made on Sat. at Cherish The Thought. It uses the Nestabilities Poinsettia die, Crafts Too Swiss Dots embossing folder and Fiscars Kimberly Polson "Words and Whimsy" clear stamps.

Sunday, 7 March 2010
Butterfly Greeting Card

This is the card project I did on Sat. March 6 at Cherish The Thought. The card blank is white, the next layer is black cardstock. The next layer of Coredinations Whitewash Collection in blue, is embossed with Flourished Frame Cuttlebug folder then sanded, I could have sanded a little more and revealed more of a darker blue colour. The top focal piece is white cardstock stamped with butterfly wings from Crafty Secrets Altered Art small set in black ink. The butterfly body is 3 sizes of blue rhinestones. This piece is added with pop dots for some dimension.
Thursday, 4 March 2010
Spellbinders Open House


On Feb 20th Jessie had a Spellbinders open house at Cherish The Thought and we made 4 cards using different Nestabilities and techniques. These are the cards I made.
Now this was a busy weekend because on Friday the 19th I went to Vancouver to check out the Olympic activities and on Sunday the 21st I went to the monthly ATC swap which is usually held at the Grind. Because of parking restrictions we met at Collage Collage and Sat night after being at the open house I got a message that Penellope had made an ATC book with pockets as a gift for the store owner, and could we contribute an ATC. So Sunday morning I made the geranium ATCs using my photo and the seed packet card technique, I really liked how the cards turned out and the ATCs turned out pretty good too.
Monday, 1 March 2010
Late For A Birthday Card


I have been so busy over the last couple of weeks that I didn't get a birthday card in the mail at the appropriate time so I made this "Just Because" card. This is a tri-fold Climb The Hill card made from a two-sided scrapbook cardstock. After scoring the folds I rubber stamped various stamps and the Quietfire sentiment stamp and the Michalels Just Because stamp with Memories Cocoa ink and printed computer genterated words for the other phrases on vellum. The flower is cut with a Sizzixx Flower layers #3 die.
Subscribe to:
Posts (Atom)


 Download a FREE copy of the Artella eBook, Artella Mae's NEW Altered Ancestors!, a 58-page eBook overflowing with ideas and techniques for using vintage photos in your artwork.
 Download a FREE copy of the Artella eBook, Artist Profiles Assembled, a 100-page eBook featuring an inside look at the lives and art of 29 fascinating artists.
 Download a FREE copy of the Artella eBook, Stunning and Simple Seasonal Salutations, an eBook featuring 10 beautiful handmade cards, complete with photos and descriptive "how-to" instructions, showcasing a variety of techniques such as rubber stamping, collage, and innovative paper and mixed media arts.